

How I Finally Beat Smudges (Yes, I Kissed a Cup and Lived)
I used to treat lipstick like a temporary tattoo for my coffee cup — and my cheek. One too many coffee crimes and a particularly mortifying date taught me that transfer is real and unforgiving. So I got obsessed.
Through experiments, mistakes, and a lot of product swatches, I built a failproof routine. It’s equal parts science, silly hacks, and stubbornness. I’ll keep this short and shamelessly personal: this piece is my love letter to transfer‑proof lipstick.
Below I share the exact ingredients I chase, my step‑by‑step application ritual, the product types I trust, and the quick fixes that saved my reputation. Let’s end lipstick smudges for good.
My Smudge Saga: Why Transfer-Proof Lipstick Is a Nonnegotiable
Confessions from the trenches
I have a small shrine of evidence: a coffee cup with a magenta smile, a silk scarf forever haunted by my lipstick, and one unforgettable interview where my blazer lapel looked like I’d been eating beets with reckless abandon. Those public smudges taught me two things fast — stains are permanent in other people’s memories, and transfer is the enemy of dignity.
Transfer-proof vs. long-wear — they aren’t the same
“Long-wear” often means the color won’t fade at rest; “transfer-proof” means the color stays put when it meets fabric, glass, or my boyfriend’s cheek. A lipstick can be long-lasting but still leave a ring on a glass. The formulas that truly resist transfer usually form a light film or polymer layer that adheres to your lips instead of smearing onto everything else. Think Stila Stay All Day or Maybelline SuperStay Matte Ink — both can last, but some Stila shades feel more transfer-resistant on me.
When transfer-proof actually matters (and why)
Each scenario has a different tolerance for dryness vs. transfer. For example, meetings favor comfort and moderate transfer control; date nights favor near-zero transfer even if you need a balm afterwards.
Quick, actionable rules I live by
Next up I’ll get into the exact ingredients and finishes I chase (and the minor chemistry that makes them behave like stubborn, lovely armor).
What I Look For in a Stay-Put Formula: Ingredients and Finishes That Work
Ingredients I actually scan for
I get a little nerdy here: I look for film‑formers and specific polymers that create that “no-transfer” shield. Favorites on labels include words like acrylates copolymer, trimethylsiloxysilicate, and polyurethane — they form a flexible layer that sticks to lip skin instead of fabric. A balanced wax blend (candelilla, carnauba, ozokerite or beeswax) gives structure so the film doesn’t flake. Pigments and silica help mattify without adding bulk.
Why a bit of alcohol or silicone isn’t evil
A little denatured alcohol speeds set time, so the product bonds faster; too much and your lips will stage a protest. Silicones (dimethicone, cyclopentasiloxane) smooth and help the film sit evenly — they’re the peacekeepers between comfort and longevity. I favor formulas that use these ingredients sparingly: enough to set, not enough to turn my lips into desert terrain.
Finishes and how they behave
Trade-offs I accept (and where I don’t)
I’ll tolerate slight dryness for near-zero transfer during a wedding or presentation, but on errands or long flights I choose a satin liquid stain or layer a sheer balm over a transfer‑resistant base. If a product lists heavy oils (petrolatum, mineral oil) high up, I expect more transfer and pass.
Quick signals that tell me “this will last”
Armed with these cues, I can usually predict whether a lipstick will survive coffee, hugs, or a quick kiss — next, I’ll show you the exact application routine I use to make those formulas behave.
My Foolproof Application Routine: Prep, Layering, and the Secret Seal
Prep: exfoliate, hydrate, and wait
I start with smooth canvas. I lightly exfoliate for 30–60 seconds (sugar scrub or a dry toothbrush), wipe away residue, then dot on a thin layer of lip balm and wait 2–3 minutes. Important ritualistic pause: I stare into the mirror and silently will my lips not to flake. Before applying, blot off any excess balm with a tissue — if your balm leaves shine, your lipstick won’t set properly.
Tools I bring to the altar
Layering: thin, precise, blot, repeat
I apply the first layer with a lip brush for precision — thin, even strokes, not a thick coat. Timing: let it dry 45–60 seconds. Then I press lips gently to a tissue and blot once (no rubbing). Second coat: another thin layer, then wait 60–90 seconds. Why thin? Thick layers sit on the surface and lift; thin layers bond to the skin and become the film I want.
The powder press (the game changer)
Fold a single-ply tissue over your lips and, using a small fluffy brush, lightly dust translucent powder through the tissue. Press don’t powder heavily — think “soft sigh,” not “snowstorm.” Wait 30 seconds so the powder absorbs residual oils and sets the film into a matte, transfer-resistant layer.
The secret seal (edges matter)
Trace the lip line with a matching liner — this locks edges and catches any tiny feathering. If I need extra longevity, I’ll do a micro third coat very sparingly, let it dry, then another quick blot. Final move: a 10–15 second mirror vow where I refuse to move my mouth dramatically for at least two minutes. Then I perform the ever-reliable tissue-kiss test. If no color transfers, I’m out the door, smug and sealed.
Next, I’ll share the specific product types and clever hacks that make this routine effortless in real life.
Product Types and Clever Application Hacks I Swear By
Liquid mattes — my go-to for long events
Liquid mattes (think Maybelline SuperStay Matte Ink or Huda Liquid Matte) are my first choice when I need clinical-level staying power: weddings, presentations, or any outing where kissing a cup would be a scandal.
Pros: insane longevity, defined edges, minimal transfer.
Cons: can pill if layered too thickly; drying—so I pair with a pre-applied balm earlier in my routine.
Stains — the low-maintenance chameleons
Stains (Benefit Benetint vibes, or Revlon Kissable Balm Stain for a softer finish) are for days I want color that fades evenly. I pick stains for casual coffee runs or sweaty workouts.
Pros: effortless, comfortable, less harsh-looking as they wear.
Cons: not as opaque; can require reapplication after oily meals.
Lip liners — the unsung heroes
A good liner (Charlotte Tilbury Lip Cheat or NYX Slim Lip Pencil) changes everything. I use liners to shape, prevent feathering, and as a base when I want my lipstick to cling. Fill the whole lip with liner under a lighter lipstick for extra hold.
Pros: prevents bleed, extends life of any formula.
Cons: needs shade-matching discipline.

Hybrid balms — comfort without surrender
When I want a softer, hydrated look that still behaves, I reach for hybrid balms (think Burt’s Bees Tinted or Bite Beauty Agave-lite tinted balms). They’re ideal for cold-weather comfort or casual office days.
Pros: moisturizing, easy to reapply.
Cons: more transfer-prone; pair with liner or a thin stain base.
Top-coat balms — rescue and reset
A clear balm or glossy top coat (Glossier Balm Dotcom, Fenty Gloss Bomb in clear) is my emergency tool: a tiny dab restores sheen and soothes lips without turning a matte into a smear-fest—if used sparingly.
Pros: instant comfort, shine control.
Cons: over-application kills matte finishes.
My favorite practical hacks
Up next: how I fix smudges when things go sideways and the lip-care rituals that keep my colors looking pristine.
Fixes, Fails, and Lip Care: How I Rescue Smudges and Keep My Lips Happy
Quick emergency fixes (discreet and non-paintball)
If I spot a smudge mid-day, my mantra is: act small, not dramatic. I dab (never rub) the edge with a dry tissue to lift excess, then use a cotton swab with a tiny amount of oil-based remover or micellar water to clean the border and reshape with a liner. For tiny transfers on cups, a wet wipe on the rim and a quick press of the lip line usually erases evidence—and my dignity.
Removing stains from skin and fabric
For skin: oil first. Olive oil, coconut oil, or a cleansing balm melts pigment; follow with micellar water to remove residue. For stubborn pigment, a dab of rubbing alcohol on a cotton swab works, but I reserve that for small spots because it’s drying.
For fabric: treat immediately. Scrape off excess, blot with cold water, then apply a drop of dish soap or liquid laundry detergent directly, let sit 10–15 minutes, rinse, and launder. For delicate fabrics, I head straight to the dry cleaner—trust me, the DIY scrubbing route is more likely to create a new problem than a solution.
Salvaging a day’s wear without looking like I fought a paintball
My go-to: blot away shine, fill in gaps with a lip liner (shade-matched), then very thinly reapply color with a lip brush only where necessary. If lips look patchy, I diffuse edges with a tiny bit of balm in the center for a lived-in sheen—no glossy hurricane. For faint, even color recovery, a stain (like Revlon Kissable balm stain) layered lightly keeps things natural.

Nightly lip rehab: reverse the damage
Every night I double-cleanse: oil to dissolve pigment, then a gentle milk or micellar cleanser. Twice weekly I exfoliate with a sugar scrub (two teaspoons sugar + a drop of oil) to slough flaky bits, then slather an occlusive overnight balm (Vaseline, Aquaphor, or a thick lip mask). Within a week my lips bounce back from long-wear dryness.
Patch-testing, rotation, and the deal-breakers
I patch-test new formulas behind my ear for 48 hours. If persistent redness, severe tingling, or cracking appears, I stop. I rotate formulas to avoid chronic irritation—one heavy-duty liquid for events, a gentle balm for daily use. I ditch any product that repeatedly dries, flakes, or causes chapping; life’s too short for lipstick that hurts.
Next up: the final swipe—my transfer-proof routine boiled down to the essentials.
Final Swipe: Your Transfer-Proof Routine, in a Nutshell
Pick the right formula, prep properly, layer smart, and seal—those four steps are my golden rules. I kept it simple, tested a few tricks, and now I rarely leave lipstick souvenirs.
Experiment lightly, laugh at mishaps, and carry a couple pocket tricks. Share your wins with me — if I can stop smudging everywhere, so can you. Send photos, tips, or your favorite transfer-proof finds — I love swapping tricks. Happy smudge-free days ahead.


Kissed a mug, kissed a boyfriend, kissed a sandwich — results: the mug won 2/3 😆
Tried the evpct 10-pack as an affordable test and some shades were surprisingly decent. Not every color is a winner but for $ it’s a fun experiment. Article’s “My Smudge Saga” chapter had me laughing — same.
Haha sandwich tests are the real-life litmus. Glad the evpct gave you some winners — pricepoint sets can be hit-or-miss but great for playing with colors.
Agreed — cheap sets are perfect for summer looks you won’t cry over if they melt in heat. Pro tip: set with a thin layer of translucent powder between layers to improve longevity.
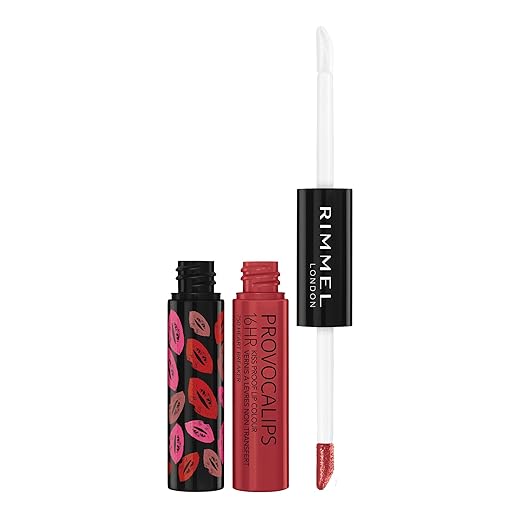
This made me actually try the Rimmel Provocalips and WHOA — the two-step thing is wild. I tried the article’s layering + seal routine and my mask only had a faint ghost of color after hours.
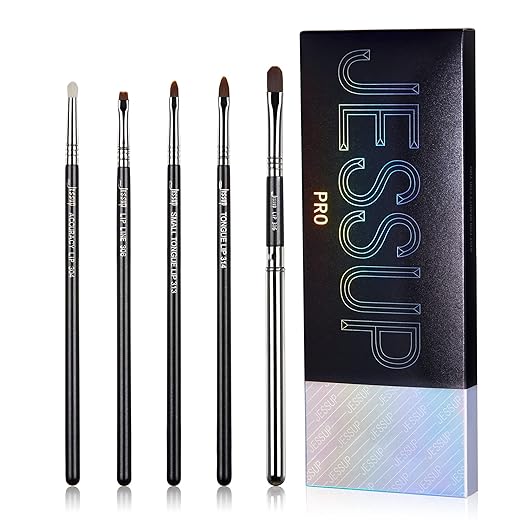
Biggest takeaways for me: exfoliate lightly, thin first layer, blot, then full coat and seal. I used one of the Jessup brushes for precise lining (game changer). Also — kissing a cup = survived 😅
Also wanted to add: if you’re using brushes, clean them weekly (a gentle soap + quick dry) so the application stays smooth. Grime = patchy wear.
Totally with you — the two-step is intense but lasts. Quick tip: if Provocalips feels too drying, a dab of pH-activated tint balm underneath adds moisture without breaking the transferproof layer.
Yesss glad it worked for you, Ethan! The Jessup brushes do help with precision — I use the small angled one for the cupid’s bow when I want crisp lines. Try adding a tiny bit of balm after the second layer if your lips feel stiff.
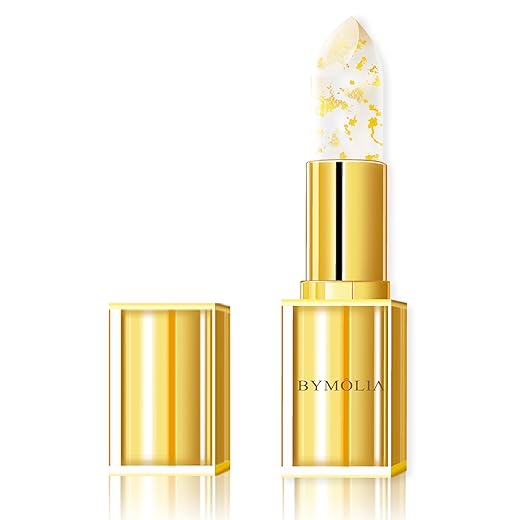
Tried the pH-activated color-changing balm at a festival and in the heat it faded into a weird patchy mess within a few hours. Maybe I sweated too much? The idea is cool but I’m skeptical about relying on it for long events.
Anyone have experiences using it under other transfer-proof formulas for stability?
Yep same — festival heat = patch city. I now use the pH balm for day-to-day but skip it for outdoor summer events unless I’m willing to reapply.
Heat + sweat can break down some of the lighter balms. Try applying a very thin layer of the pH balm, blotting, then using a waterproof long-wear formula on top (like Provocalips). The balm adds personalization without being the main color-holder.
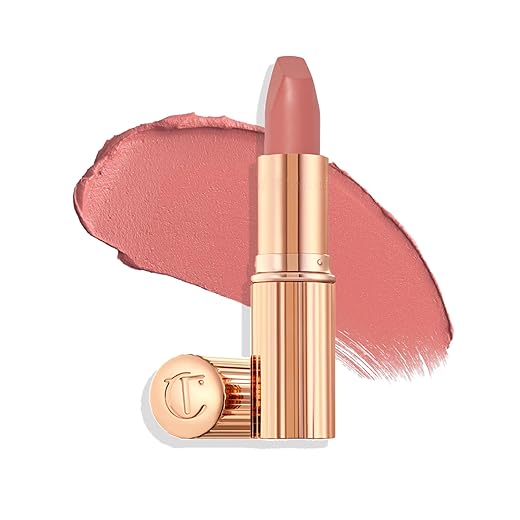
Great roundup. I love the idea of transfer-proof, but honestly some of these formulas (looking at you, Matte Revolution) make my lips flake if I wear them for a full day.
I appreciated the section on Fixes, Fails, and Lip Care — I started alternating heavy balm nights (W7 Sweet Dreams set is pure nostalgia) with my long-wear days and it helped. Has anyone tried the pH-activated balm under a matte for less dryness? Curious if that actually extends wear.
I do exactly that — balm under matte — and it helps but you’ll still get slight transfer on oily foods. If you’re eating, bring the balm to rehydrate; for kissing-proof wear, layer the two-step or use a seal technique.
One more tip: apply balm, blot with tissue, then apply matte. The blot prevents the balm from breaking the matte’s adhesion but preserves moisture.
Thanks for the note, Maya — dryness is the biggest trade-off. I do recommend using a thin layer of the pH-activated tint balm under particularly drying formulas (Charlotte Tilbury Matte Revolution can be finicky). It helps lock color while reducing flakiness. Also, do a light sugar scrub once or twice a week.
Thanks! I’ll try the light scrub + pH balm trick. Also haha the W7 kit smells like childhood — perfect for night care 😄
Thanks for the honest hacks! Quick Q — if I only want to buy two things from the product list for a reliable beginner kit, what would you recommend? I’m thinking one long-wear + one lip care item. Also: does the Jessup brush set really matter if I’m just learning? 😊
One more thing — if you want a second color option, the evpct 10-pack is a budget-friendly way to experiment without commitment.
Perfect, thank you! Buying the Rimmel + W7 tonight. Might add a single Jessup brush later. Excited to try the “secret seal” step 😄
If you’re building a starter kit: get one reliable long-wear (Rimmel Provocalips is affordable and solid) + a lip care set (W7 Sweet Dreams or a good nightly balm). The Jessup brush set is optional but helpful — even one small brush can vastly improve application if you’re aiming for clean lines.
Agree with admin. Start small: Rimmel + W7. You can use a cotton swab instead of a brush at first, but if you like neat edges, the Jessup set is worth it.
Solid write-up. I particularly loved the “What I Look For in a Stay-Put Formula” section — breakdown of ingredients + finishes is so helpful.
My routine (borrowed + modified from the article): lip scrub -> thin balm -> outline with the tiny Jessup brush -> light first coat (blot) -> full coat -> blot -> sealing pat with tissue + translucent powder -> final thin coat.
If I’m doing a night out I swap the final thin coat for a long-wear like Rimmel or Charlotte Tilbury and then seal. Works 90% of the time. Also, anyone else find the color change balm weirdly personal? It always picks a shade slightly different on me than on my friend.
Love this, Hannah — that’s basically my foolproof routine too. And yes, pH tints react to your skin’s chemistry, so they’ll be subtly different on everyone. It’s part of the charm.
And tiny reminder: use a soft powdered brush to remove excess powder around the lip edge so it doesn’t look cakey.
I press with lips slightly pursed so the powder sits in creases evenly. If you puff your cheeks it can get patchy.
That step-by-step is gold. Quick question: where do you press the tissue for powder? Lips flat or slightly pursed?
Agree about the pH balm. On me it turns more mauve; on my friend it was straight coral. Weird but fun!